MSE-5: The Weekend Project That Wasn’t

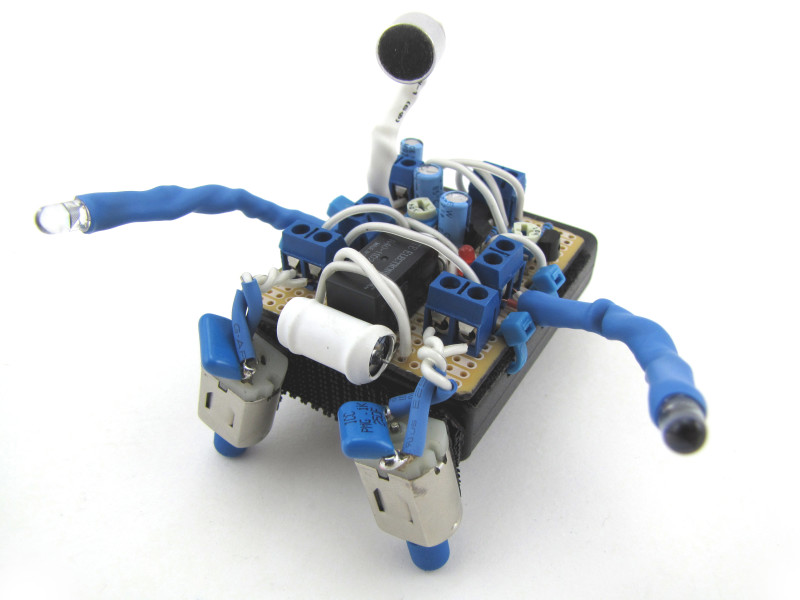
An elaborate but small hand-assembled BEAM style robot with carefullly coordinated colors in blue and white.

All parts are from RadioShack. Photo ca. August, 2012.

This is a Herbie-style BEAM photovore with a reversing relay. But instead of a bump switch, the “retreat” reflex is triggered by a sharp, loud sound like a clap. It was developed for MAKE’s RadioShack “Weekend Projects” campaign in the summer of 2012; the prompt specified a project that responded to both light and sound. “MSE” was intended to nod at “Mousey the Junkbot,” Gareth Branwyn’s famous Herbie-style build from “The Absolute Beginner’s Guide to Building Robots” (and MAKE Vol 06). MSE-5 was by most standards a failure, coming in three weeks past deadline and well over budget due to persistent line noise problems that would cause the reversing relay to trigger over and over again. I did eventually iron out the bugs, but the final build was much too complicated and never saw use. Still, the finished ‘bot turned out pretty sharp-looking, and I learned a heckuva lot about electronics in a very short time.

Though I can’t necessarily recommend that anyone should build it as-written, a complete PDF of the unpublished Make: Projects MSE-5 tutorial is available at the link below.

MSE-5: A Light- and Sound-Sensing Robot

OCD Bristlebot

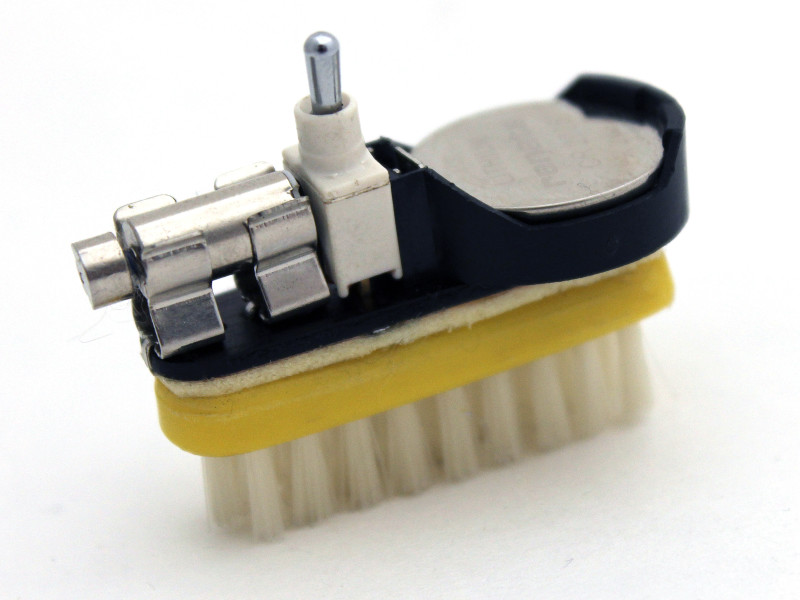
A yellow toothbrush head, with white bristles, that's been cut from the handle. The bristles are on the ground, and there's a layer of foam tape on the back of the head securing a small piece of black phenolic board that matches the shape of the head.  On top of the phenolic board are a small pager motor, mounted in fuse clips, a toggle switch, and a CR2032 coin cell battery holder with a battery inside it.

Plastic toothbrush head, fuse clips, pager motor, toggle switch, copper-clad board, double-stick tape, coin cell and holder.

I made this little robot sometime in mid-2014. The motor case, fuse clips, and most of the underside copper layer are grounded, with small “islands” manually cut clear to carry Vcc. The sides and top of the phenolic board are stained black with Sharpie marker, and the foam tape provides a solid interface with a bit of give to accommodate the underside solder points. The toothbrush belonged to my grandmother; I found it in a travel kit in a piece of very old luggage.

“Drains to Creek,” 2014

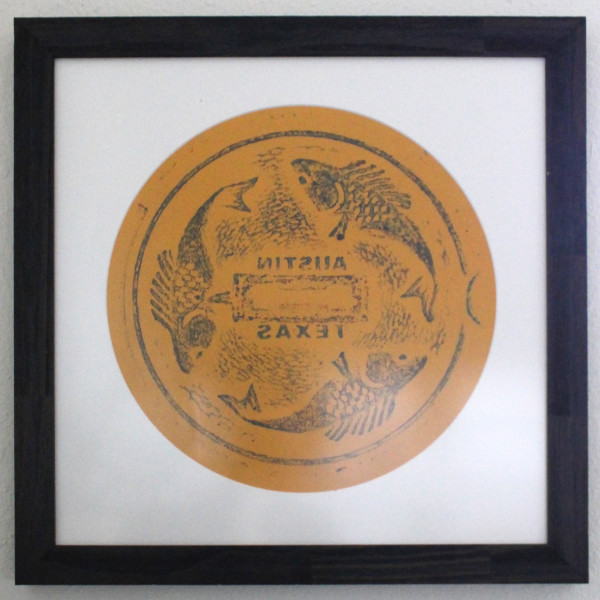
A blue and green rubbing on orange paper, in a circular mat, in a square dark purple frame. The rubbing design features three stylized fish chasing each other around a circle, with the words AUSTIN TEXAS mirror-reversed at the center.

Fadeless bulletin board paper, oil crayon, fixative.

This is a small manhole cover rubbing I took in August 2014 my then-girlfriend Dr. Suzanne Stambaugh at a storm sewer on the corner opposite my old house. It uses a different technique from my earlier rubbing—here the color is applied to the steel first, then the paper laid on and burnished over it. This was Suzanne’s idea. (Thanks, Snoo!) The three-fishes design indicates a sewer that empties into a natural reservoir, rather than a treatment plant. Supposedly, the historic O’Raigan coat of arms sports a similar motif.

Seek Thermal Imager HTC DNA Hack

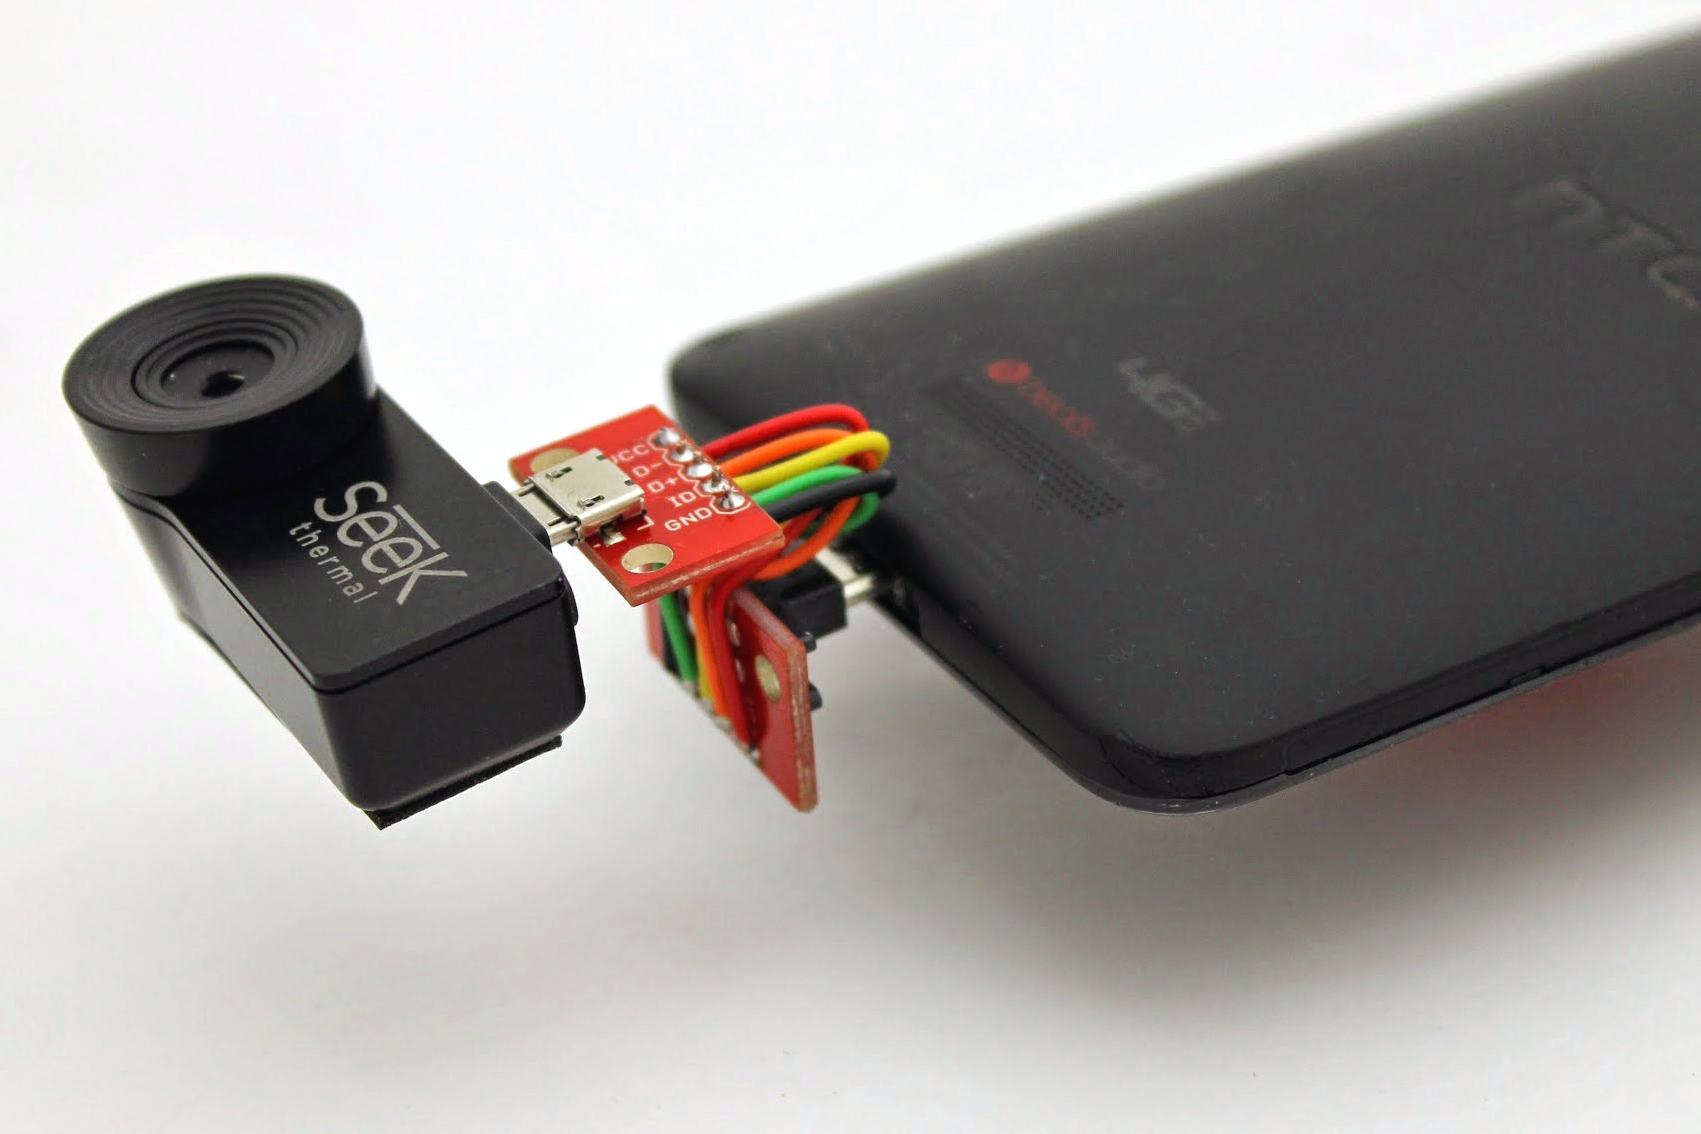
Close shot of bottom rear of HTC DNA smartphone with improvised reversing adapter attached between the phone and a Seek thermal imager add-on.

Possibly the best gift I received in 2014 was this Seek thermal add-on imager for my phone. Unfortunately, the device comes with a non-reversible micro-USB plug attached, and the single jack on my HTC Droid DNA is “upside down,” meaning the imager’s optic ends up facing the same way as the screen.

Otherwise, the thing works like a champ: app was easy to install, works well, plugged in and started up with no problems, etc. The hardware’s also pretty slick, and comes with a ruggedized keychain case so you can carry it around in your pocket. But it’s basically useless with the lens facing the wrong direction.

The Seek website recommends this six-inch male/female micro-USB extension cable for devices affected by this “backwards” problem. I bought one and it didn’t work. Again: Plug the imager directly into the phone port and it works fine; plug it in through a 6-inch USB cable—the one the manufacturer recommends—and it doesn’t. Neither the phone OS nor the imager app shows any sign of detecting the device. This was especially frustrating because the very first review on the Amazon page for this cable is titled “Works fine with the Seek Thermal.”

About this time I discovered, to my chagrin, that micro-USB extension cables come in various flavors depending on whether they are for charging/syncing the phone or allowing it to serve as a USB host (“OTG”). The hackers and engineers reading this will immediately understand my frustration at this idea—it’s an extension cable, for f*ck’s sake: All the contacts at one end should be connected to the corresponding contacts at the other end, with continuous conductors between them. Is that really too much to ask? Omitting certain conductors just serves to fragment the market and create artificial demand for multiple purchases from individual users. Nonetheless, on a lark, I bought the complementary “charging” cable and discovered that, unsurprisingly, it does not work either.

Getting really pissed off now, I hopped over to eBay and bought a US-made 6-inch micro-USB extension cable advertised as “ALL 5 WIRES CONNECTED,” which of course is what “extension cable” should mean in the first place.

Guess what? That cable didn’t work either. There was, however, now at least a glimmer of hope. Using the eBay cable, the phone OS would detect the imager’s presence just as if it were plugged directly into the port. But the imager app, itself, still showed the (now infuriatingly glib) prompt, “Connect camera to enable thermal imaging.”

Shown in the photo is what finally worked. I jumped over to SparkFun and bought matching male and female micro-USB breakout boards, then manually soldered solid-core breadboard jumper wires between the two. I did as neat a job as possible on my little homemade ribbon cable, then put a single twist in it to turn the lens in the right direction.

Now, finally, it works. But the whole experience has left me with an intense distrust of USB cables, and very impatient for the new reversible Type C micro USB connector to arrive.
Gorgeous Antique British Light Switch

Beautiful Antique British Light Switch

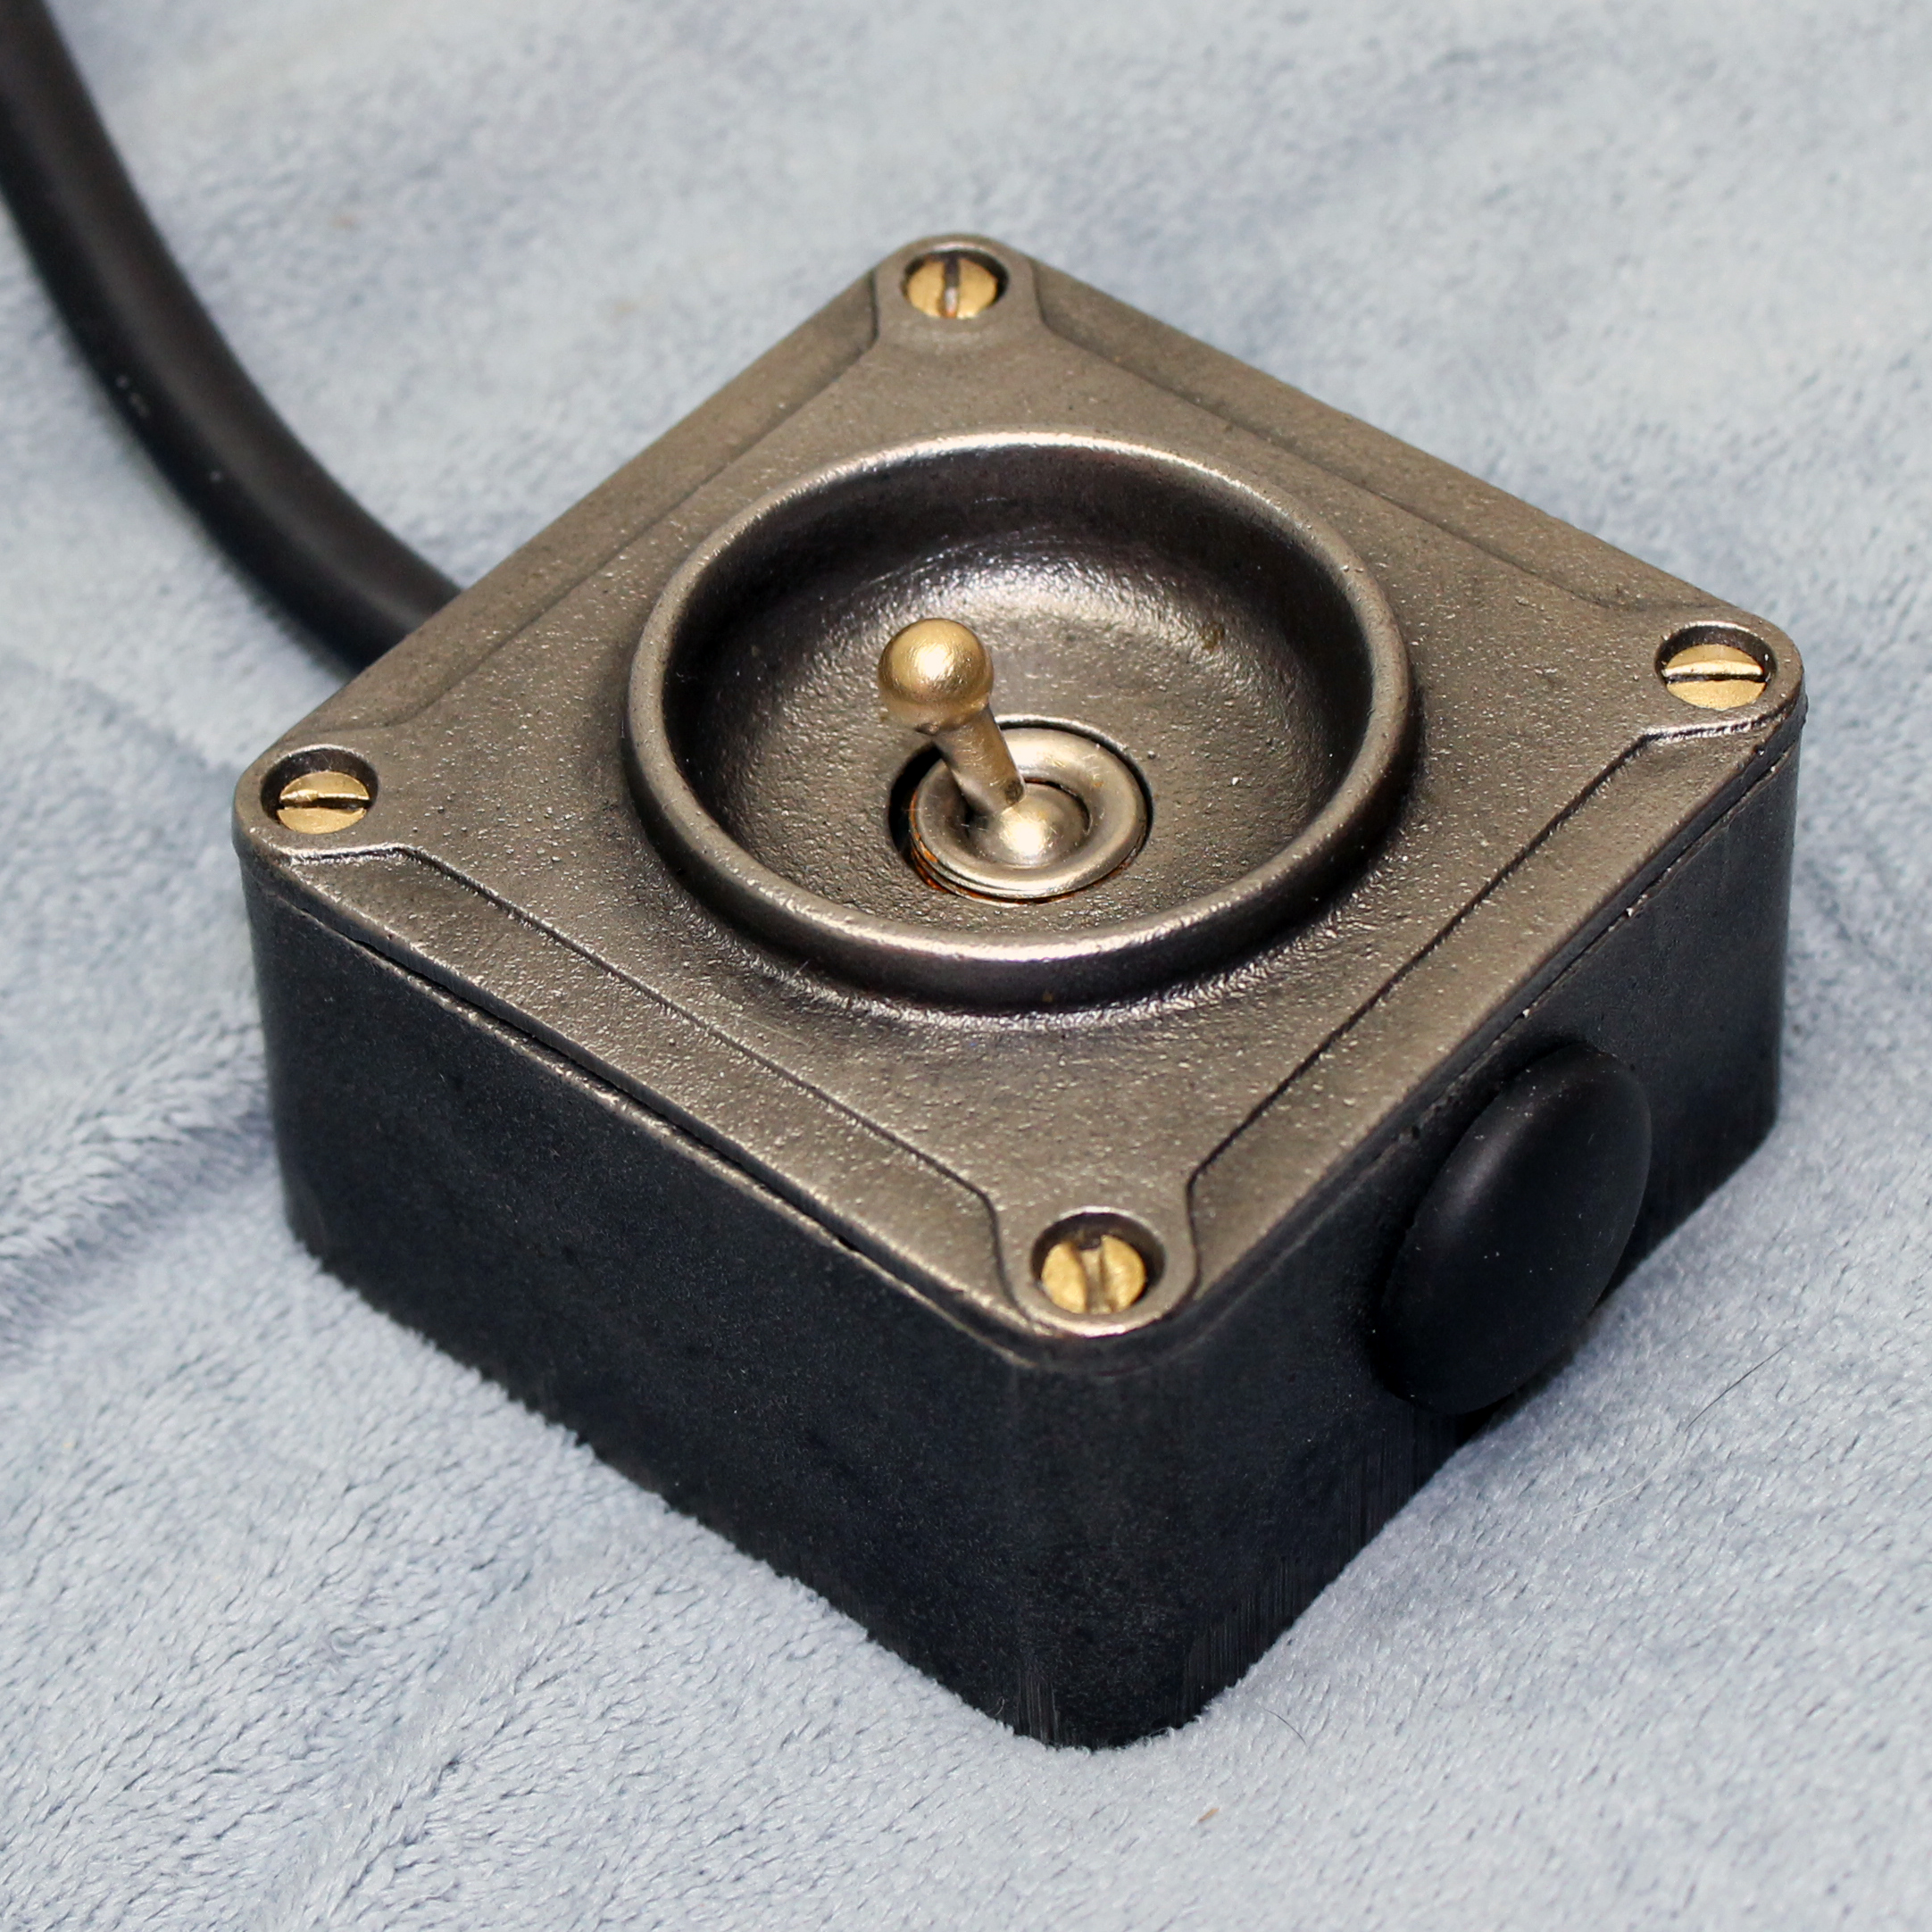
They don’t make ’em like they used to. This is a Crabtree model A15051 single-gang AC light switch, with cast iron body, that I recently scored on eBay. It was likely manufactured in the 30s, 40s, or 50s, and restored by the eBay seller. I wired it as a remote switch for my photo soft box. Thing’s built like a tank, beautiful to look at, feels great to the touch, and operates with a satisfying CLACK.